The Project Template I Use for Every Single Edit
Seven years ago a director called me mid edit asking for one specific interview line. I knew the quote, I remembered the moment vividly, but I could not find it. Forty five minutes of opening sequences and scrubbing later, the call had turned cold. That evening I built my first project template, and I have refined it on every edit since.
It saves me twenty to thirty minutes of setup per project, kills the where did I put that problem, and means another editor can open my project without asking me a single question. This is the full breakdown. Steal what works. If freezes still keep breaking your flow, my notes on why Premiere Pro crashes pair well with everything below.
The Bin Structure
The Project Panel is the backbone of organization. My template ships with a pre built bin tree that I use on every job, from a thirty second social spot to a feature documentary.
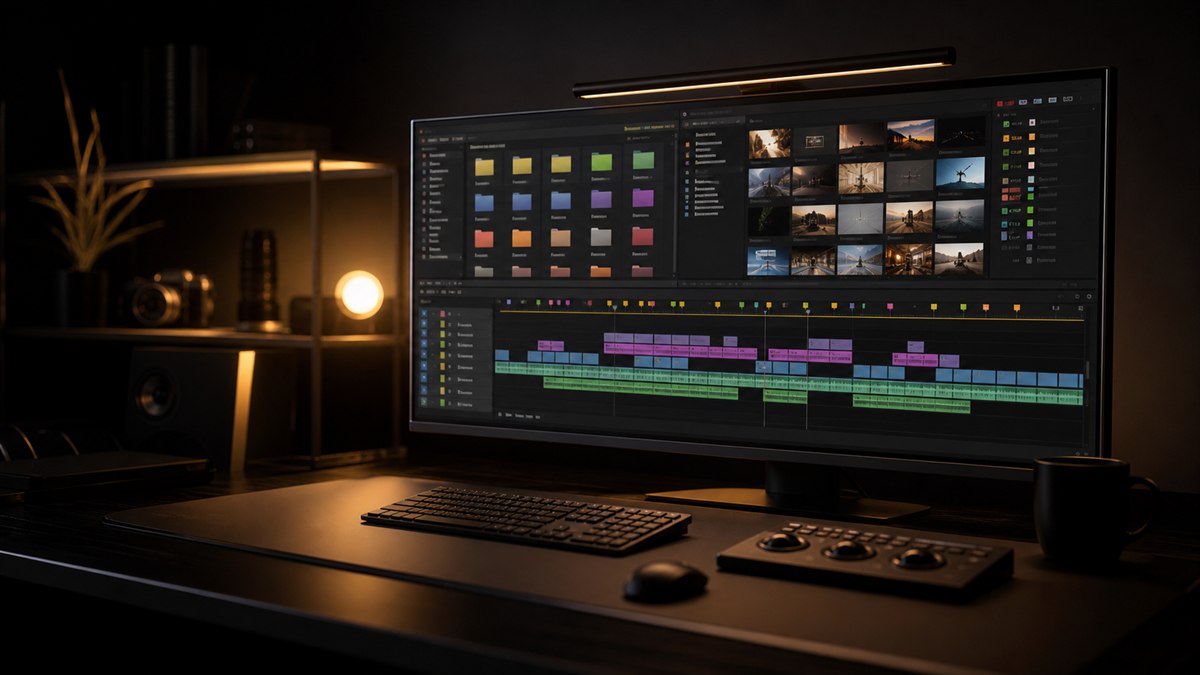
The template bin tree
- •_00_CURRENT CUTS. Aliases to the active sequences so the top of the panel always shows live work.
- •_01_FOOTAGE. Sub bins 01A_INTERVIEWS, 01B_B-ROLL, 01C_ARCHIVAL, 01D_SCREEN_RECORDS.
- •_02_AUDIO. Sub bins 02A_MUSIC, 02B_SFX, 02C_VO, 02D_MIX_STEMS.
- •_03_GRAPHICS. Sub bins 03A_TITLES, 03B_MOTION_GRAPHICS, 03C_LOGOS.
- •_04_SEQUENCES. Sub bins 04A_ASSEMBLY, 04B_ROUGH_CUTS, 04C_FINE_CUTS, 04D_FINALS.
- •_05_EXPORTS. Sub bins 05A_REVIEW, 05B_DELIVERY.
- •_06_REFERENCE. Sub bins 06A_SCRIPTS, 06B_CREATIVE_BRIEF, 06C_CLIENT_NOTES.
- •_ARCHIVE. Old versions kept, not deleted.
A few things to notice about that structure. The underscore prefix on every bin name keeps it sorted at the top of the Project Panel. Without underscores Premiere sorts your bins alphabetically alongside your clips and the structure gets buried.
The numbered prefixes (01, 02, 03) force a consistent order. Premiere sorts alphabetically, so AUDIO would land before FOOTAGE, which is backward from how I actually work. Numbers override alphabetization. The letter suffixes (01A, 01B, 01C) let me add sub bins without breaking the order. If I need a new footage category, it gets the next letter.
_00_CURRENT CUTS sits at the very top. It contains aliases (shortcuts) to whatever the active working sequences are. I make a new alias every time I jump to a new cut version, so the top of the panel always shows me exactly where the live work lives.
_ARCHIVE is where old versions go. Not deleted, archived. Sequences I am no longer working on but might need to reference. Old graphic versions. Rejected music cues. It keeps the active bins clean while preserving everything.
Sequence Naming Conventions
Sequence names matter more than most editors think. A good convention tells you everything you need to know about a sequence in three seconds. My format is [PROJECT]_[TYPE]_[VERSION]_[DATE]_[EDITOR INITIALS].
Examples in the wild
- •ACME_ROUGH_v02_20241015_PJ
- •ACME_FINE_v01_20241018_PJ
- •ACME_FINAL_v03_20241022_PJ
- •PROJECT. A short client or project name. Keep it under six characters where you can. ACME, not Acme Industries Brand Film Q4.
- •TYPE. What kind of cut: ASSEMBLY, ROUGH, FINE, FINAL, COLOR, AUDIO, DELIVERY.
- •VERSION. Two digit number with a leading zero. v01, v02, v03. Never FINAL_FINAL or v3_ACTUAL_FINAL. Version numbers are sacred. When I hit v10 on a fine cut that itself is information. The project has had heavy revision rounds and I should check my client correspondence for patterns.
- •DATE. YYYYMMDD format. It sorts correctly and tells me how recent the sequence is without opening file info.
- •EDITOR INITIALS. So I know who made what when more than one editor touches a project. If I am the only editor I still include my initials. Consistency matters, and there will probably be another editor someday.
When I cut a new version I use File > Save As and immediately rename the sequence to match the convention. The old version stays in _04_SEQUENCES > 04B_ROUGH_CUTS. The new version gets an alias in _00_CURRENT CUTS.
Pro tip. Before I send any cut to a client, I duplicate the sequence and append _SENT to the name. ACME_ROUGH_v02_20241015_PJ_SENT. That gives me a snapshot of exactly what the client saw. If they come back three weeks later with notes on the version from last Tuesday, I know precisely which sequence to open.
- Piotr Toczynski
The Color Labeling System
Premiere has sixteen color labels and most editors use maybe three. I use all of them, with the same meaning on every project.
My label map
- •Violet. Master or hero interview.
- •Iris. Secondary interview.
- •Caribbean. B roll (general).
- •Lavender. Archival or stock footage.
- •Cerulean. Aerial or drone footage.
- •Forest. Approved or final selects.
- •Mint Green. Needs review.
- •Lemon Yellow. Placeholder or temp.
- •Orange. Client provided footage.
- •Rose. Problem clip (corrupted, sync issue, needs fix).
- •Crimson. Do not use (rejected).
- •Pink. Music cue.
- •Magenta. SFX.
- •Blue. Graphic or title element.
- •Yellow. Color reference or LUT test.
- •Green. Final approved export.
I apply these labels in the Project Panel, not on the timeline. The Project Panel is the source of truth. If a clip is labelled Forest in the project, it is approved. If I label something differently on the timeline that change is temporary and does not touch the source clip status.
The labels also sync to the timeline if you enable the Label column in the timeline display. I keep that column visible so I can see clip status at a glance while editing.
To set this up go to Edit > Preferences > Label Colors (Premiere Pro > Settings > Label Colors on Mac). I rename the default labels to match my system. Then, under Label Defaults, I set the default label for each media type. Video gets Caribbean. Audio gets no label. Sequences get Forest. So every new sequence is automatically green. A small thing, but it saves a manual label every single time.
Marker Conventions
Markers in Premiere are underused. They are not just note to self stickers, they are a communication system. My template ships with a marker scheme that everyone on the project understands.
- •Green markers. Temp music cues. I drop these at the start of a music track with the track name, artist, and mood. When I replace the temp with licensed music, the green marker gets deleted.
- •Yellow markers. Editor notes. Things I need to come back to. Check sync here. Needs color pass. Find better B roll for this section.
- •Red markers. Client notes imported from review sessions. When a client sends timestamped feedback (I use VideoReview.pro for this, which exports markers straight into Premiere) the notes come in as red markers. I can see at a glance which notes are mine (yellow) and which are from the client (red).
- •Blue markers. Chapter markers for delivery. These become chapter points in the final export when the delivery spec requires them.
- •Purple markers. Graphic callouts. Lower third here. Title card needed. End screen graphics.
I also use marker durations. A green music marker spans the whole temp track. A yellow editor note might be a single frame at the cut point. Red client notes span whatever section they refer to, from a single shot to a whole scene.
Pro tip. If you get client notes as a Word doc or an email instead of timestamped markers, do not try to remember them. I spend ten minutes at the start of every revision round translating client notes into red markers on the timeline. It feels like slow work, but it means I never miss a note and I can tick markers off as I complete them. Ten minutes of setup saves hours of re reading client emails wondering whether I already fixed something.
- Piotr Toczynski
The Sequence Template
Every new sequence in my template starts with pre built tracks and naming.
Default track layout
- •V5: TITLES / GRAPHICS
- •V4: MOTION GRAPHICS / LOWER THIRDS
- •V3: B ROLL / ARCHIVAL
- •V2: INTERVIEW (B CAM)
- •V1: INTERVIEW (A CAM) / HERO FOOTAGE
- •A1: INTERVIEW MIX (L)
- •A2: INTERVIEW MIX (R)
- •A3: MUSIC
- •A4: SFX
- •A5: TEMP VO / SCRATCH
- •A6: MIX STEM (L)
- •A7: MIX STEM (R)
- •A8: ROOM TONE / AMBIENCE
This layout matches my editing workflow. Interview A cam sits on V1 as the base layer. B roll covers on V3. Graphics float on V4 and V5. Audio has dedicated tracks for each element, which makes mixing and stem export much cleaner. When I create a new sequence from the template these tracks are already named and ready. I do not spend time reorganizing, I just start cutting.
Preset Integration
The template includes bins of presets that I use on every project. They do not live inside the template project itself (Premiere does not handle that well) but I keep them in a dedicated folder structure that I import at setup.
- Open the project template.
- Import the current preset collection from my cloud synced folder.
- Copy presets into the right bins. Transitions into 03_GRAPHICS, custom effects into a sub bin called CUSTOM EFFECTS, LUTs into 06_REFERENCE > LUTS.
The preset pack I lean on is the Ultimate Presets. It is a comprehensive collection that covers transitions, motion presets, color grades, and text animations. I use maybe 30 percent of what is in the pack on any given project, but it is the right 30 percent. The common moves I do not want to rebuild from scratch every time. A push in with motion blur. A clean whip pan. A film grain overlay. The cross dissolve with a hint of flare that quietly works on everything.
Having those in my template means I can drag a preset onto the timeline without breaking flow. I am not hunting through menus or recreating the same zoom from 95 to 100 keyframes for the hundredth time. The presets sit right there in the _GRAPHICS bin, and because they are part of the template they are organized consistently on every project.
If you do not have a preset system yet, browse the full presets and plugins library or grab Essential Motion 3.1 for free as a solid starting point.
Setting Up the Template Project
Here is how to build your own template from scratch.
- Create a new blank project. Name it _TEMPLATE_[YEAR]. The underscore keeps it at the top of any file list.
- Build your bin structure. Create every bin from your planned tree. Leave them empty, the structure is what matters.
- Create a base sequence. Set it up with your standard track layout, naming, and any consistent elements (a standard color bar at the head, a two pop if you work in broadcast, slates if your clients expect them).
- Configure your label colors. Go to Preferences > Label Colors and set up your system.
- Save and close.
- Duplicate the project file when you start a new job. Never work directly in the template. Always duplicate first.
I keep my template on Dropbox and duplicate it locally for each new project. When I update the template, maybe I add a new bin category or refine the track layout, I save a new version with an updated year. _TEMPLATE_2024 becomes _TEMPLATE_2025 when I make significant changes.
The Payoff
The time savings from a good template are hard to overstate. On a small job I save fifteen minutes of setup. On a large project with hundreds of clips, multiple sequences, and a team of editors, the template saves hours and prevents the organizational drift that turns projects into messes.
"The real benefit is not time. It is mental bandwidth. When every project looks the same I do not waste energy figuring out where things are. I know where the interviews live. I know which sequences are current. I know what the red markers mean. The project becomes familiar territory and I can focus entirely on the edit itself."
- Piotr Toczynski
Build the template once. Refine it over time. Let it become invisible, the foundation that supports everything else you do. If your hands are also faster than your brain on shortcuts, pair this template with my notes on Premiere Pro keyboard shortcuts that save me two hours a week and on the proxy workflow that lets me edit 6K on a laptop.
Want more like this? Browse the CTTP blog, grab Essential Motion 3.1 for free, and pair this template with the Ultimate Presets for a faster setup.
Share this article