The Proxy Workflow That Lets Me Edit 6K on a Laptop
Last fall I took on a documentary shooting 6K Blackmagic RAW. The producer warned me we might need rough cuts on location, and the only machine we would have was a MacBook Pro. I said yes, because I knew something she did not. The footage did not matter. The proxies did.
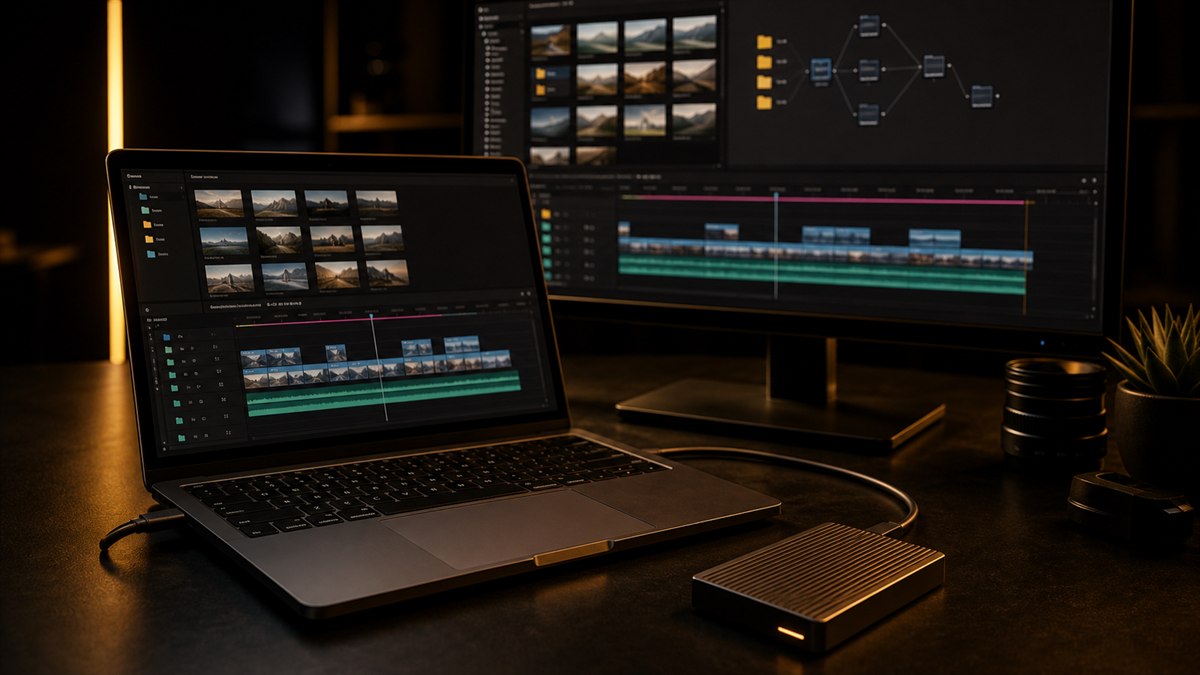
Three weeks later I was sitting in a production van in the Utah desert, cutting six-camera multicam interviews on that laptop with zero dropped frames. The full resolution 6K files were on a shuttle drive back at the hotel. I had not even copied them to the machine. I was editing proxies off a Samsung T7 SSD, and the cut was buttery smooth.
That is the power of a proper proxy workflow. It is not a workaround or a make do solution, it is how professionals handle high resolution footage. If you are not using proxies, you are working harder than you need to, and probably dropping frames you do not even realize are dropping. If crashes are also part of your week, my guide on why Premiere Pro crashes pairs well with everything below.
What Proxies Actually Are (And What They Are Not)
The Premiere Pro proxy system creates lower resolution copies of your source files. Those copies are used for playback and editing, while the full resolution originals are used for final export. The switch is seamless. You toggle between proxy and full res with a single button click.
What proxies are not: they are not a replacement for organized media management, they are not a magic fix for bad footage, and they are definitely not something you create haphazardly. Bad proxy settings can waste enormous amounts of time and storage. The key insight is that proxies are a preview format, not a delivery format. You want them small enough to play back smoothly, but not so compressed that you cannot judge focus or color.
Setting Up the Ingest Settings (Do This Once)
The ingest settings are the foundation. You configure them once, and every file you import gets proxied automatically. Here is how I set mine up:
- Create a new project, or open an existing one.
- Go to File > Project Settings > Ingest Settings, or click the wrench icon in the Media Browser panel.
- Check Enable Ingest.
- Under Action, select Create Proxies.
- Under Preset, choose your proxy format. More on this below.
- Under Proxy Destination, I always select Create Proxies next to original media in a Proxy folder. This keeps proxies organized and separate from full res files.
Pro tip
The ingest settings only apply to files imported after you enable it. If you have already imported footage, you need to generate proxies manually. Select the clips in your Project Panel, right click, and choose Proxy > Create Proxies. Do not assume your existing footage got proxied just because you turned on ingest.
Choosing Your Proxy Preset
Premiere comes with built in proxy presets, but I do not use any of them. They are either too big, like ProRes Proxy at full resolution, which does not help much on a laptop, or too aggressively compressed, like low bitrate H.264, which makes it impossible to check focus. So I build my own.
I create a custom ingest preset using Adobe Media Encoder. Here is the recipe:
- •Format: QuickTime
- •Codec: ProRes 422 Proxy, or DNxHR LB if you are on Windows without ProRes
- •Resolution: half of source, so 6K becomes roughly 3K and 4K becomes 1080p
- •Frame rate: match source exactly
- •Audio: pass through, no conversion
Why ProRes 422 Proxy at half resolution? It plays back on virtually any machine made in the last five years, the files are roughly 10 to 15 percent the size of full res ProRes 422, and the quality is good enough that I can judge sharpness, exposure, and color without switching back to full res. On a recent project with 8TB of 6K BRAW, the proxy folder totaled 1.2TB. That is manageable.
If I am cutting on an underpowered machine, an older laptop or an Air that is really struggling, I drop to ProRes Proxy at quarter resolution, roughly 720p from a 4K source. At that size even a spinning hard drive can keep up. The image is soft, but you can still tell if a shot is in focus and if the performance is usable. That is all you need for an assembly cut. When I need pixel level detail for color work or VFX prep, I skip proxies entirely and work in full resolution. Proxies are for the editing phase. Color and finishing happen in full res.
The Toggle Button: Your New Best Friend
Once proxies are generated, you see a new button in the Program Monitor, the Toggle Proxies button. It looks like a rectangle with a slight shadow. Click it. Orange means proxies are active, gray means you are viewing full res.
I mapped this to a keyboard shortcut because I use it constantly. Go to Edit > Keyboard Shortcuts, search for Toggle Proxies, and assign it to something you will remember. I use Shift+P, because P is for proxy and my thumb is already near Shift. I keep proxies on for 95 percent of the edit. I only toggle to full res when:
- •Checking critical focus on a close up
- •Doing color correction that requires seeing the full image
- •Before final export, to confirm everything looks right
- •When a client is in the room and I want to show the best possible image
Pro tip
If you toggle proxies off and your timeline goes red and starts dropping frames, do not panic. That is exactly what should happen on a machine that needs proxies. The red means Premiere is struggling to play full res in real time. Toggle proxies back on and keep cutting. The final export uses the full res files regardless.
Generating Proxies for Existing Projects
What if you already imported all your footage before setting up ingest? Here is the fix. In the Project Panel, select all clips you want proxied. I usually select by folder, all the interview clips, then all the B roll. Right click and choose Proxy > Create Proxies, choose your preset and destination, and click OK. Adobe Media Encoder opens and starts batch processing.
The time this takes depends on your clip count and machine. For a typical project with 200 to 300 clips, expect 30 to 90 minutes. I usually start this at the end of the day and let it run overnight. One warning: Media Encoder needs to stay running for proxy generation. If you close it, the queue pauses. I always confirm the queue is finished before I start editing the next morning. Nothing is worse than thinking you have proxies and discovering half your clips were never processed.
The Offline to Online Workflow
This is the workflow I used in that Utah van. First, I create proxies on the main workstation. At the office, on the fast machine, I import all the footage with ingest enabled and the proxies get created next to the originals. I copy the proxy folder, and only the proxy folder, to a fast external SSD.
On the laptop, I create a new project and import the proxy files directly. Premiere sees them as regular media, and I edit normally. When I am back at the office, I open the project on the main workstation. Premiere asks where the media is, and I point it to the original full res files. Because the proxy and full res files share the same timecode and duration, Premiere relinks perfectly.
This is called a proxy first workflow, and it is how most feature films and high end series are cut. The offline editor works with low res proxies, and the conform happens later with the full res camera negatives. Premiere makes this surprisingly painless for a consumer priced NLE.
Common Proxy Pitfalls
- •The forgot to toggle problem. You finish your cut with proxies on, export, and the client calls asking why the deliverable looks soft. I did this once, exactly once. Now I have a pre export checklist taped to my monitor. Step three: toggle proxies off and check the Program Monitor is sharp.
- •Silent proxy failures. Sometimes a clip fails to proxy with no obvious warning. The symptom is one clip that will not play smoothly even though everything else does. Right click the Project Panel header row, enable the Proxy column, and any clip that says None did not get proxied. Regenerate it manually.
- •Audio codec mismatches. If audio disappears or drifts out of sync in your proxies, check the preset and make sure audio is set to pass through rather than re encoded. Pass through copies the audio stream as is and avoids conversion issues.
- •Storage math surprises. I once had an assistant generate ProRes 422, the full quality version, at full resolution as proxies. The proxy folder was larger than the original camera media. Double check your preset before you batch generate 500 clips. The name should say Proxy, as in ProRes 422 Proxy or DNxHR LB.
Speeding Up the Rough Cut
Once your proxies are running smooth, the next bottleneck is the edit itself. For rough cuts I rely on a preset pack that gives me one click transitions, common scale and position animations, and color starting points. I use Ultimate Presets, a comprehensive pack of Premiere Pro presets covering transitions, motion graphics setups, and color grades that work right out of the box.
The combination of smooth proxy playback and instant preset application means I can cut a ten minute rough cut in a morning. No waiting for previews to render, no rebuilding the same push in animation from scratch for the twentieth time. The presets are drag and drop, and because I am working in proxies, they preview in real time even on the laptop. You can browse the full lineup on the presets and plugins page.
Storage and Organization
My proxy folder mirrors the footage folder exactly. Under the project root I keep a Footage folder with Interviews, B Roll, and Drone subfolders, and a Proxy folder with the same three subfolders inside it. When I copy footage to a new drive, I copy the proxy folder with it. This parallel structure means relinking is straightforward, because Premiere can find proxies automatically when the relative paths match.
I keep proxies on the fastest drive I have available. If that is an internal NVMe, great. If it is an external Thunderbolt SSD, that works too. What you do not want is proxies on a slow USB spinning drive, because it defeats the purpose. The whole point is smooth playback, and a slow drive creates the same stutter you are trying to escape.
When Not to Use Proxies
Proxies are not always the answer. I skip them when the source footage is already a lightweight codec, like 1080p H.264 from a DSLR, when the project is under five minutes with minimal footage, when I am doing heavy color work where I need to see the full image at all times, or when the turnaround is so tight that proxy generation time is not available. For most of my projects, though, proxies are standard. The time spent generating them pays back in smoother playback, faster editing, and the ability to work on any machine I happen to have with me.
"Proxies are not about making Premiere do something it should not. They are about using the tool the way it was designed."
- Piotr Toczynski
Final Thought
Premiere has had robust proxy support since 2015. If you are still trying to play back 4K H.265 on your timeline and wondering why it stutters, you are fighting a battle that was already won. Generate proxies, toggle them on, and edit in peace. Pair that with a solid preset pack and you get smooth playback, instant transitions, and an editing experience that actually feels good. That is what we are all after.
Want to go deeper? Read more on the CTTP blog, and when you are ready to cut faster, grab Ultimate Presets from the presets and plugins lineup.
Share this article